
Follow the step by step video and printed instructions below for how to record your running. Please do not forget to perform the additional exercises on video so we have the information we need to best serve you.
Video Formats Accepted:
.mov
.mp4

When you have collected the required footage (.mov or .mp4 format only), you can upload your video through Dropbox. Just setup an account with them and email it to [email protected]. Please indicate in your email what type of device was used to capture your video (Ie, Android or Apple). Once we have access to your video, we will perform a brief review to ensure that we have what we need. One of our Care Coordinator’s will then contact you to schedule an appointment at our facility to discuss our findings. Your therapist will then take the necessary time to fully assess the footage and prepare for your onsite visit.

At your private appointment (40 minutes one on one with a licensed physical therapist), we will obtain more information from you, discuss our findings then provide recommendations and exercises as appropriate.
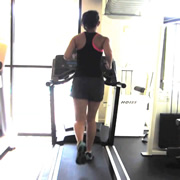
Depending on your height, you will need to be about 4 feet behind the treadmill and place the camera at hip height. A chair, stool or tripod are good options. Be sure to capture the entire runner’s body, from feet to above the head.
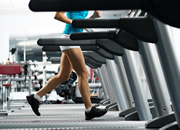
Place your camera 12-18 inches away from the treadmill and on a 4-8 inch platform. A yoga block, shoe box or tripod work great. This close up of your lower body should include half your thigh down to the bottom of the treadmill.
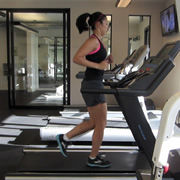
Include the whole treadmill and the runner. Again, placing the camera at hip height about 4 feet away often works best.
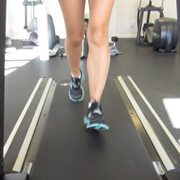
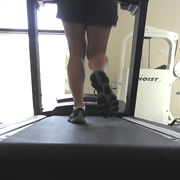
This is similar to the lower body posterior view. Be sure to capture the runner from mid-thigh to feet.
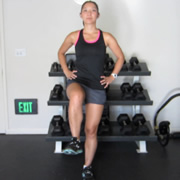
Single limb balance: Stand on one leg with your hands on your waist. Your goal is to balance for 20-30 seconds with as little movement as possible.
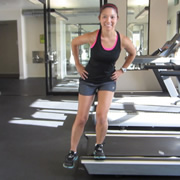
Single limb step down: Step down to the side from a 4 to 6 inch step. A stack of books or stool are good alternatives. Place your hands on your waist. Perform 10 repetitions.